Welcome back allot-potters! This is the March instalment of my allotment progress! AKA allot-pot, which if you didn’t know, is the love child of the allotment and potager garden. A lot of work has been happening in the last 4 weeks, which hopefully you will be able to see. As a result, I am getting very excited for the summer months and all the beautiful flowers and tasty veg we will have!! 🤞🏻
Thus, my aim is to give you some inspiration of your own to start transforming your own garden or allotment…er.. allot-pot! In this update, I am going to show you 1️⃣ my complete planting beds 2️⃣, how I created some of my structures, and 3️⃣ the progress of the plants, planting and sowing! However, as always, if you want to see where I started you can read the first two instalments of my allotment journey, ’introducing the allot-pot’ and my fabulous February update.
Progress Allot-potters! January – February 2024
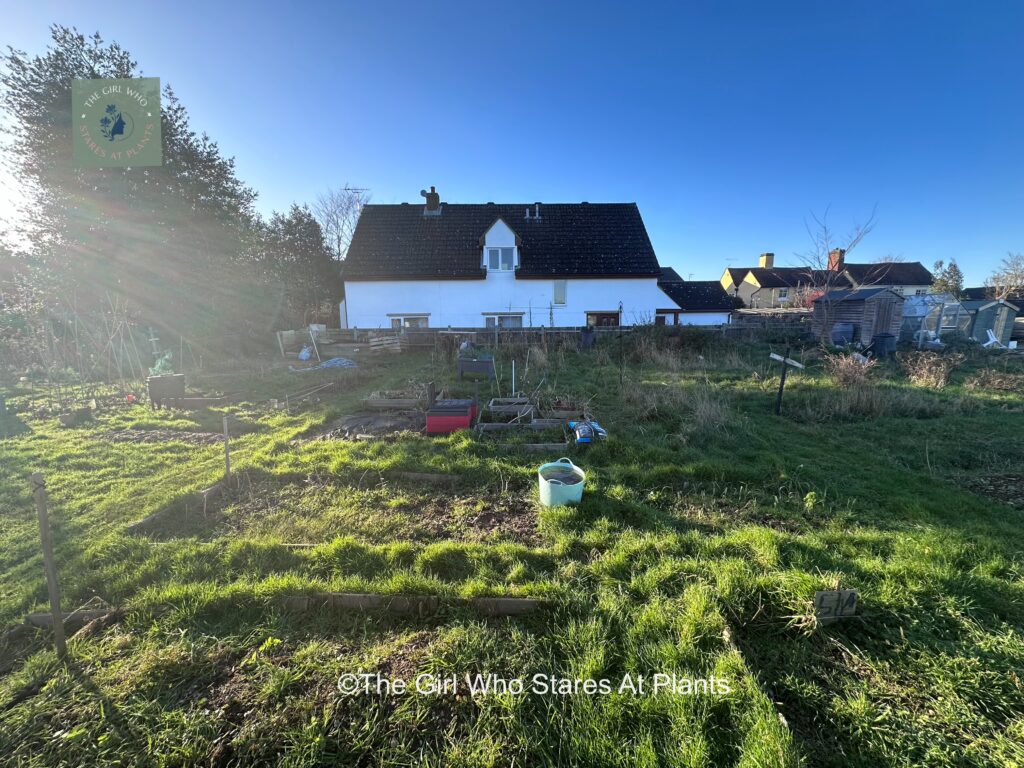
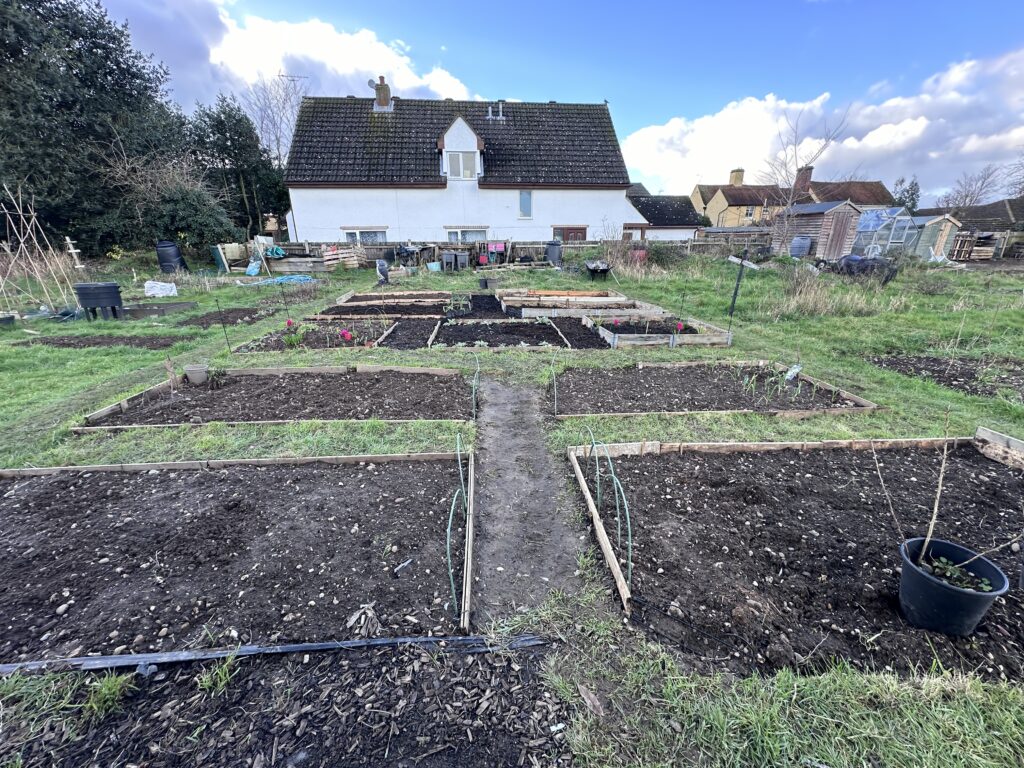
So, to remind you, this is what my allotment / allot-pot looked like at the start of the year.
Allot-pot objectives – March
So, let’s recap on what my allotment transformation objectives were for March and what I actually achieved. The reason I do this is because it ensures I make the most of my time at the allotment, and stops me from staring at plants 👀
- Finish off the planting beds ✅
- Build the hazel bean pole structures ✅
- Build the sweet pea teepee ✅
- Plant the central cherry tree ✅
- Plant the perennial herbs, raspberry canes and rhubarb ✅
➕ In fact, this month I did more than I expected on the allotment, as I also planted out strawberries, broccoli, garlic, leeks and onions.
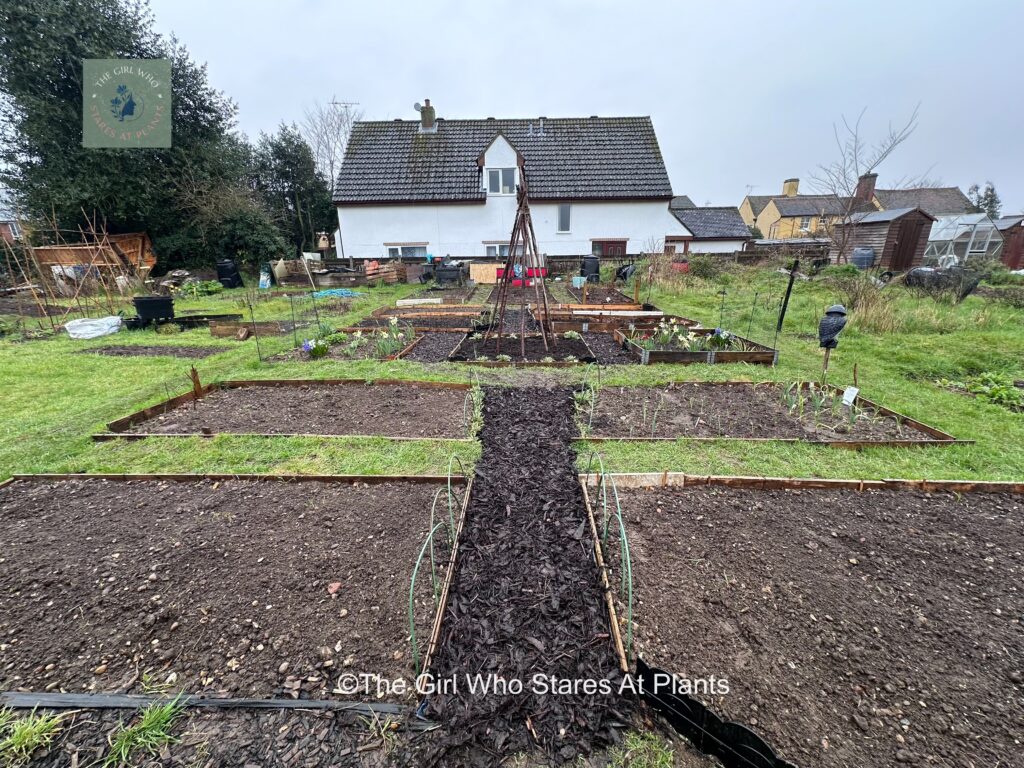
➕I finished all the landscape bark paths too! Which means less mowing of the grass paths! Woo hoo!
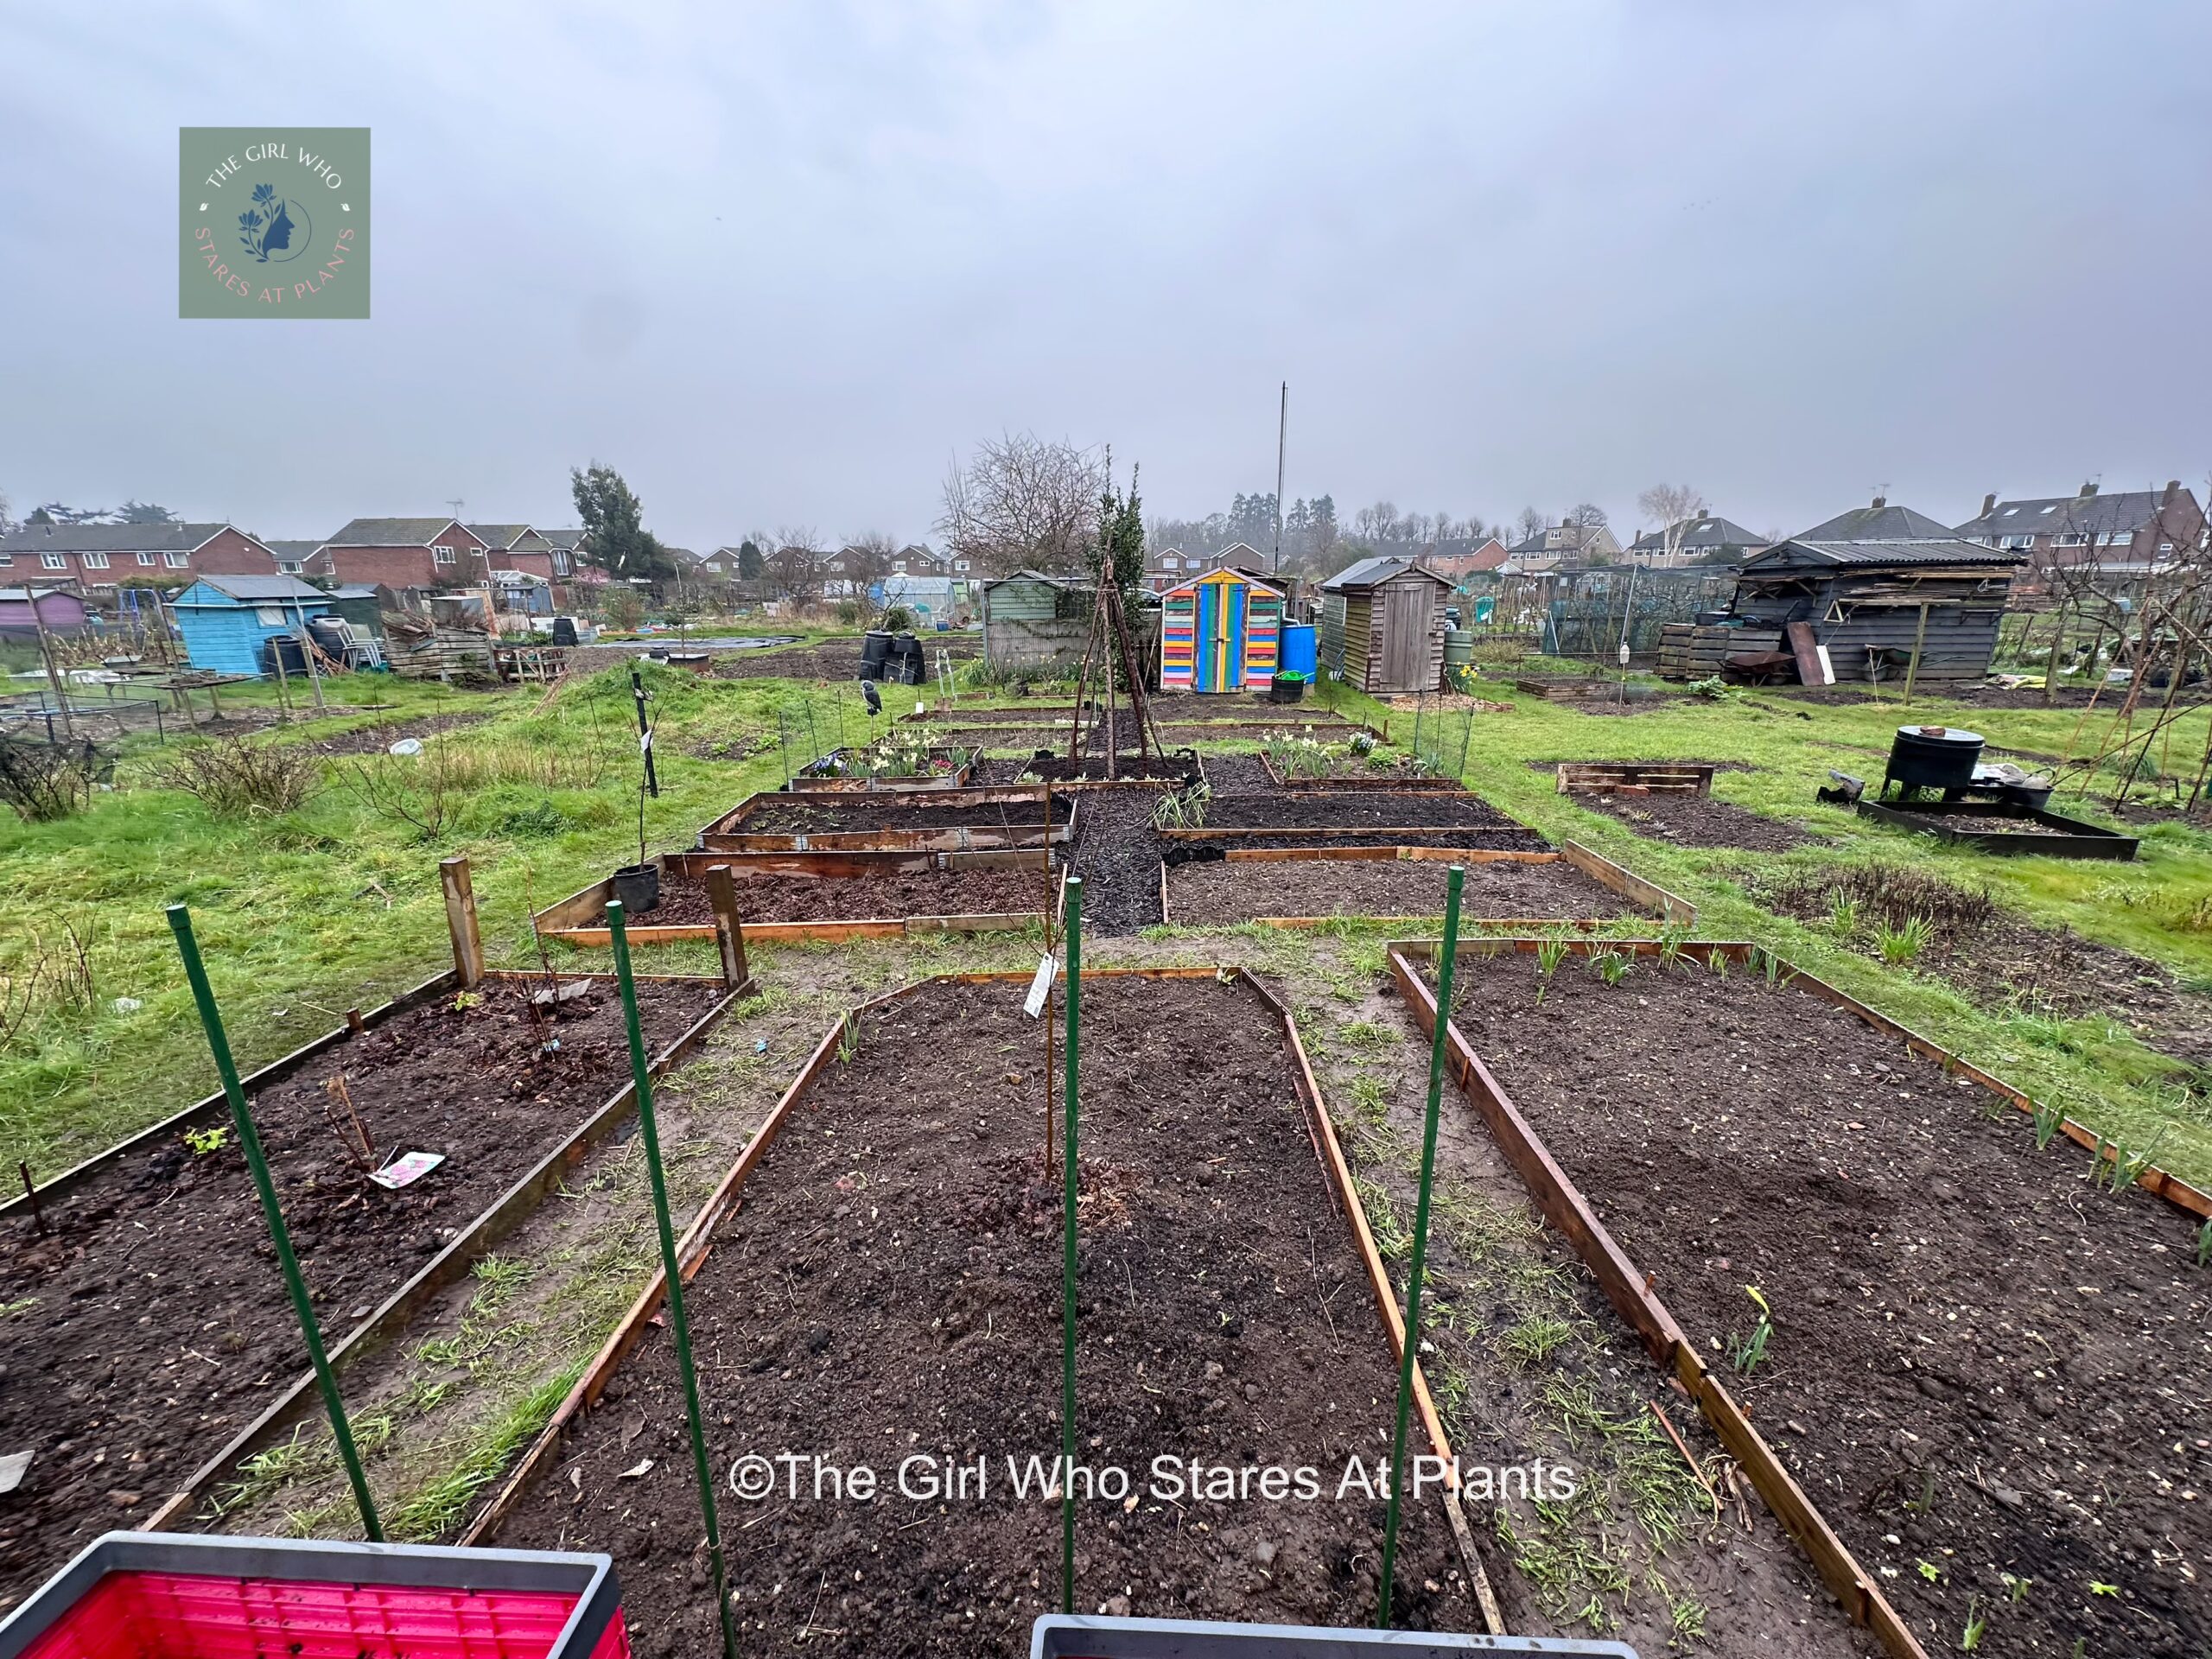
And as a result of all the hard work, here is what the allot-pot looks like now!
How did I do it?
Every month, I try and give you an overview of how I did the little jobs in my allotment so that if you want to do the same, you can!
Finish off beds
Firstly, I had the last 3 beds to finish, which were the ones that were dug the least over the years. Therefore they were a bit harder than the rest of the beds. However, I used the same method as the others, and eventually after a few backbreaking days they were done! Although, I did end up scrabbling around for bits of edging, as you will probably see by the pictures. I even ended up using bits of old bed frame!
Whilst I was doing this, I also had to change the design and therefore the planting plan. This is because I decided to make the beds smaller meaning I have more of them. So, now I can reach the centre of each bed from the pathways. Therefore I don’t have to step on and disturb the soil. I also drew a very basic plan to stick on the shed wall so we know where the plants are going!
As a result, I now have a fruit bed at the top right of the plot which I didn’t have before. Also, I changed the planting plan a bit, but ensured that I still have companion planting therefore a pretty plot. I also ended up buying a few trays of vegetable that I wasn’t planning on growing (who can resist this??) So, the lesson is don’t be afraid to change your plans as you go along, because gardens develop organically and that is half the fun!
The central allotment hazel teepee
Secondly, I built the teepee. And, out of all the tasks I did on the allotment, building plant supports was the easiest. I am relatively lucky in that I have a number of hazel trees in my garden which I coppice (take all the branches off to encourage new growth), but if you don’t have one, you can easily buy branches or grow a tree yourself!
So, I cut down nine stems that are about 3 inches in diameter and 7 foot long. Then I put them in the centre of the bed, evenly spaced and tied them together with garden twine. Very simple and they look great. The final thing I will do before the sweet peas are planted, is wind twine around the outside of the tee pee, all the way to the top. Because then the sweet peas will have something to latch onto and grow up. Of course you can use this simple structure for all sorts of climbing veg and flowers.
The allotment bean supports
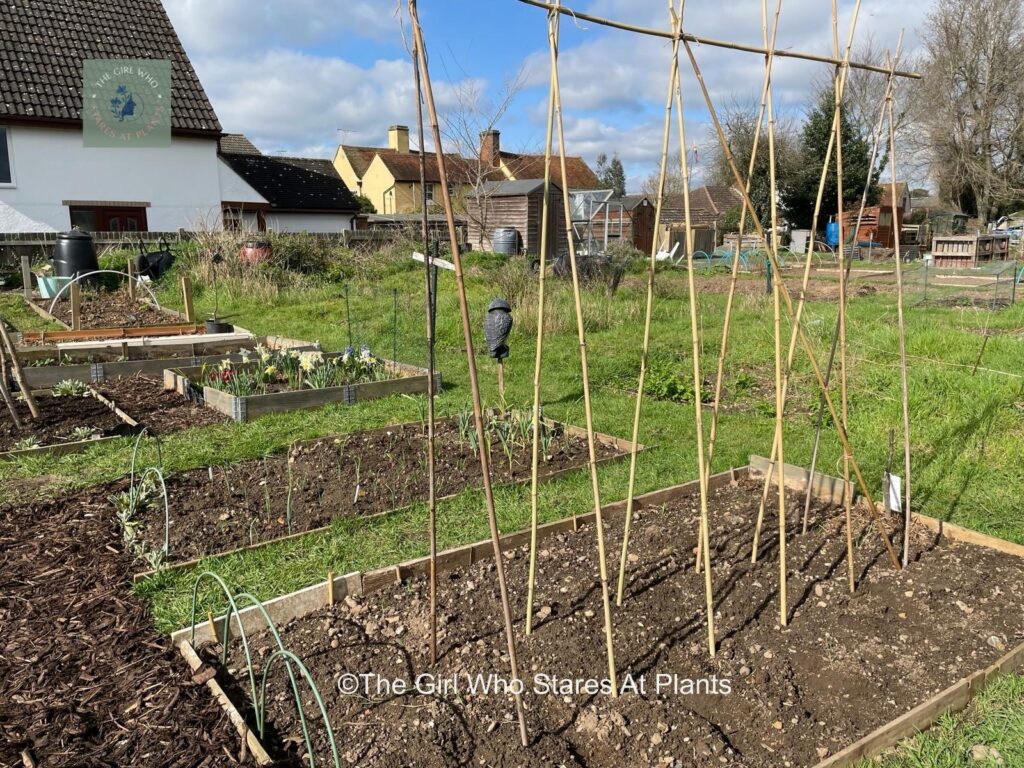
I also built the pea and bean support this month. That I did with bamboo canes and I also made it to be a bit more linear. I used 7 foot bamboo canes and garden twine, and honestly, it was really easy to do. Next, I will plant a runner bean plant at the bottom of each cane on one side, and a french bean plant at the bottom of each cane on the other.
Allotment planting
This month has seen a number of plants go into the allotment beds.
Fruit
Morello cherry tree – planted in the centre of the back allotment bed and mulched with rotted manure.
Raspberry canes – dug up from the existing stock, but also added to via donations from friends as well as bought from the garden centre. So for the donated canes, I have no idea whether they are summer or autumn fruiting so have had to cut them back and will just wait and see if I get any fruit this year.
This is because autumn raspberry’s fruit on new canes but summer ones (which are bigger and bushier) take a bit longer. Fingers crossed I have a mix of both!
Tayberry and Goji berry – this is the first time I have grown either of these, so we will have to see how they do! I will of course let you know!
Step over fruit
I planted these last month and realised I didn’t actually tell you how I did it. Because rather than buy ones that had already been trained as step overs I thought I would do it myself. Firstly, I planted the tree (on a dwarf root stock) and then cut the main stem down to two buds. When these grow I will then train them horizontally. Additionally, as it felt like such a waste to just throw the main stem and branches away, I have planted them as cuttings. All I did was trim them below a bud, leaving 7-8 buds on each stem, and then stuck them in some soil.
As I was just going to throw the stems away, it will be an added bonus if they grow! Particularly because if you watch the first episode of Gardeners World, the advice is that two of each plant is needed to ensure plenty of fruit. So, if my cuttings don’t take I will have to buy a few more trees, so another reason to keep your fingers crossed for me! Oh, and if you want to read all about propagation, you can have a look at my post dedicated to just that!
Allotment vegetables for winter
Sprouts and purple sprouting broccoli – I bought a tray of sprouts and broccoli because I wanted to try and have veg all year. I bought them rather than sowed them, because I was too late to sow them for this year. The sprouts in particular needed to get in the ground so they can grow ready for Christmas dinner. Both are big plants, so they share a bed. I planted 9 of each and have 3 of each left over, which I will pot on ready to be subbed in if necessary!
Garlic/onions/leeks – we already had some garlic growing in the beds from last autumn, so we dug them up to replant. We did this carefully because garlic is fussy and doesn’t really like to be moved therefore keep as much soil on the roots as possible. The onions I bought as little bulbs, grew them on and then planted them out. You can see how I did this on my instagram account.
Sow and Grow
So, I have also been eagerly watching my previously sown seeds and my tomatoes, cerinthe, malva, sweet peas, dill, parsley, lovage, chillies and strawflowers are now all coming on nicely and will be ready for potting on soon.
Finally, I have sown more seeds for cut flowers and food. I have sown purple kale, green kale, nasturtium, cosmos, antirrhinum (snapdragons), geraniums, dahlias, lettuce, courgette, cucumbers, corriander, kalettes, thunbergia, spinach, ipomoea and sunflowers. I have even sown some melon for the greenhouse!
Conclusion
So there you have it, my march allotment (allot-pot) update.
I will aim to post my next update around the middle of April and am hoping to achieve the following:
- Sow peas indoors to prevent mice eating them, and when ready plant out
- Try and sow another succession of salad leaves and tender herbs
- Sow carrots in raised boxes because this prevents carrot root fly (the flies don’t fly over 20cm)
- Build an archway with wire trellis over the pathway, so I can grow squash up it
- Start building mini greenhouse and use salvaged windows (oooh I hear you say….)
Happy gardening!
Jt x

