Welcome allot-potters!
This is the second instalment of my allot-pot progress. I hope you to keep you updated on a monthly basis as to the progress of my allot-pot and all the bits I have been doing to turn it into a fully functional allotment-x-potager garden!
During this update, I will show you the progress I’ve made, and how I’ve done it. Thus giving you some inspiration of your own to start transforming your own garden. I’m going to focus on three things. 1️⃣ Firstly, how I created my planting beds. 2️⃣ Secondly, how I created my pathways. And 3️⃣ thirdly, what seeds I have sown this month. Furthermore, let me give you a reminder of what the allot-pot looked like when I started. Also, if you want to see how I created my design then head over to my first post ’introducing the allot-pot’.
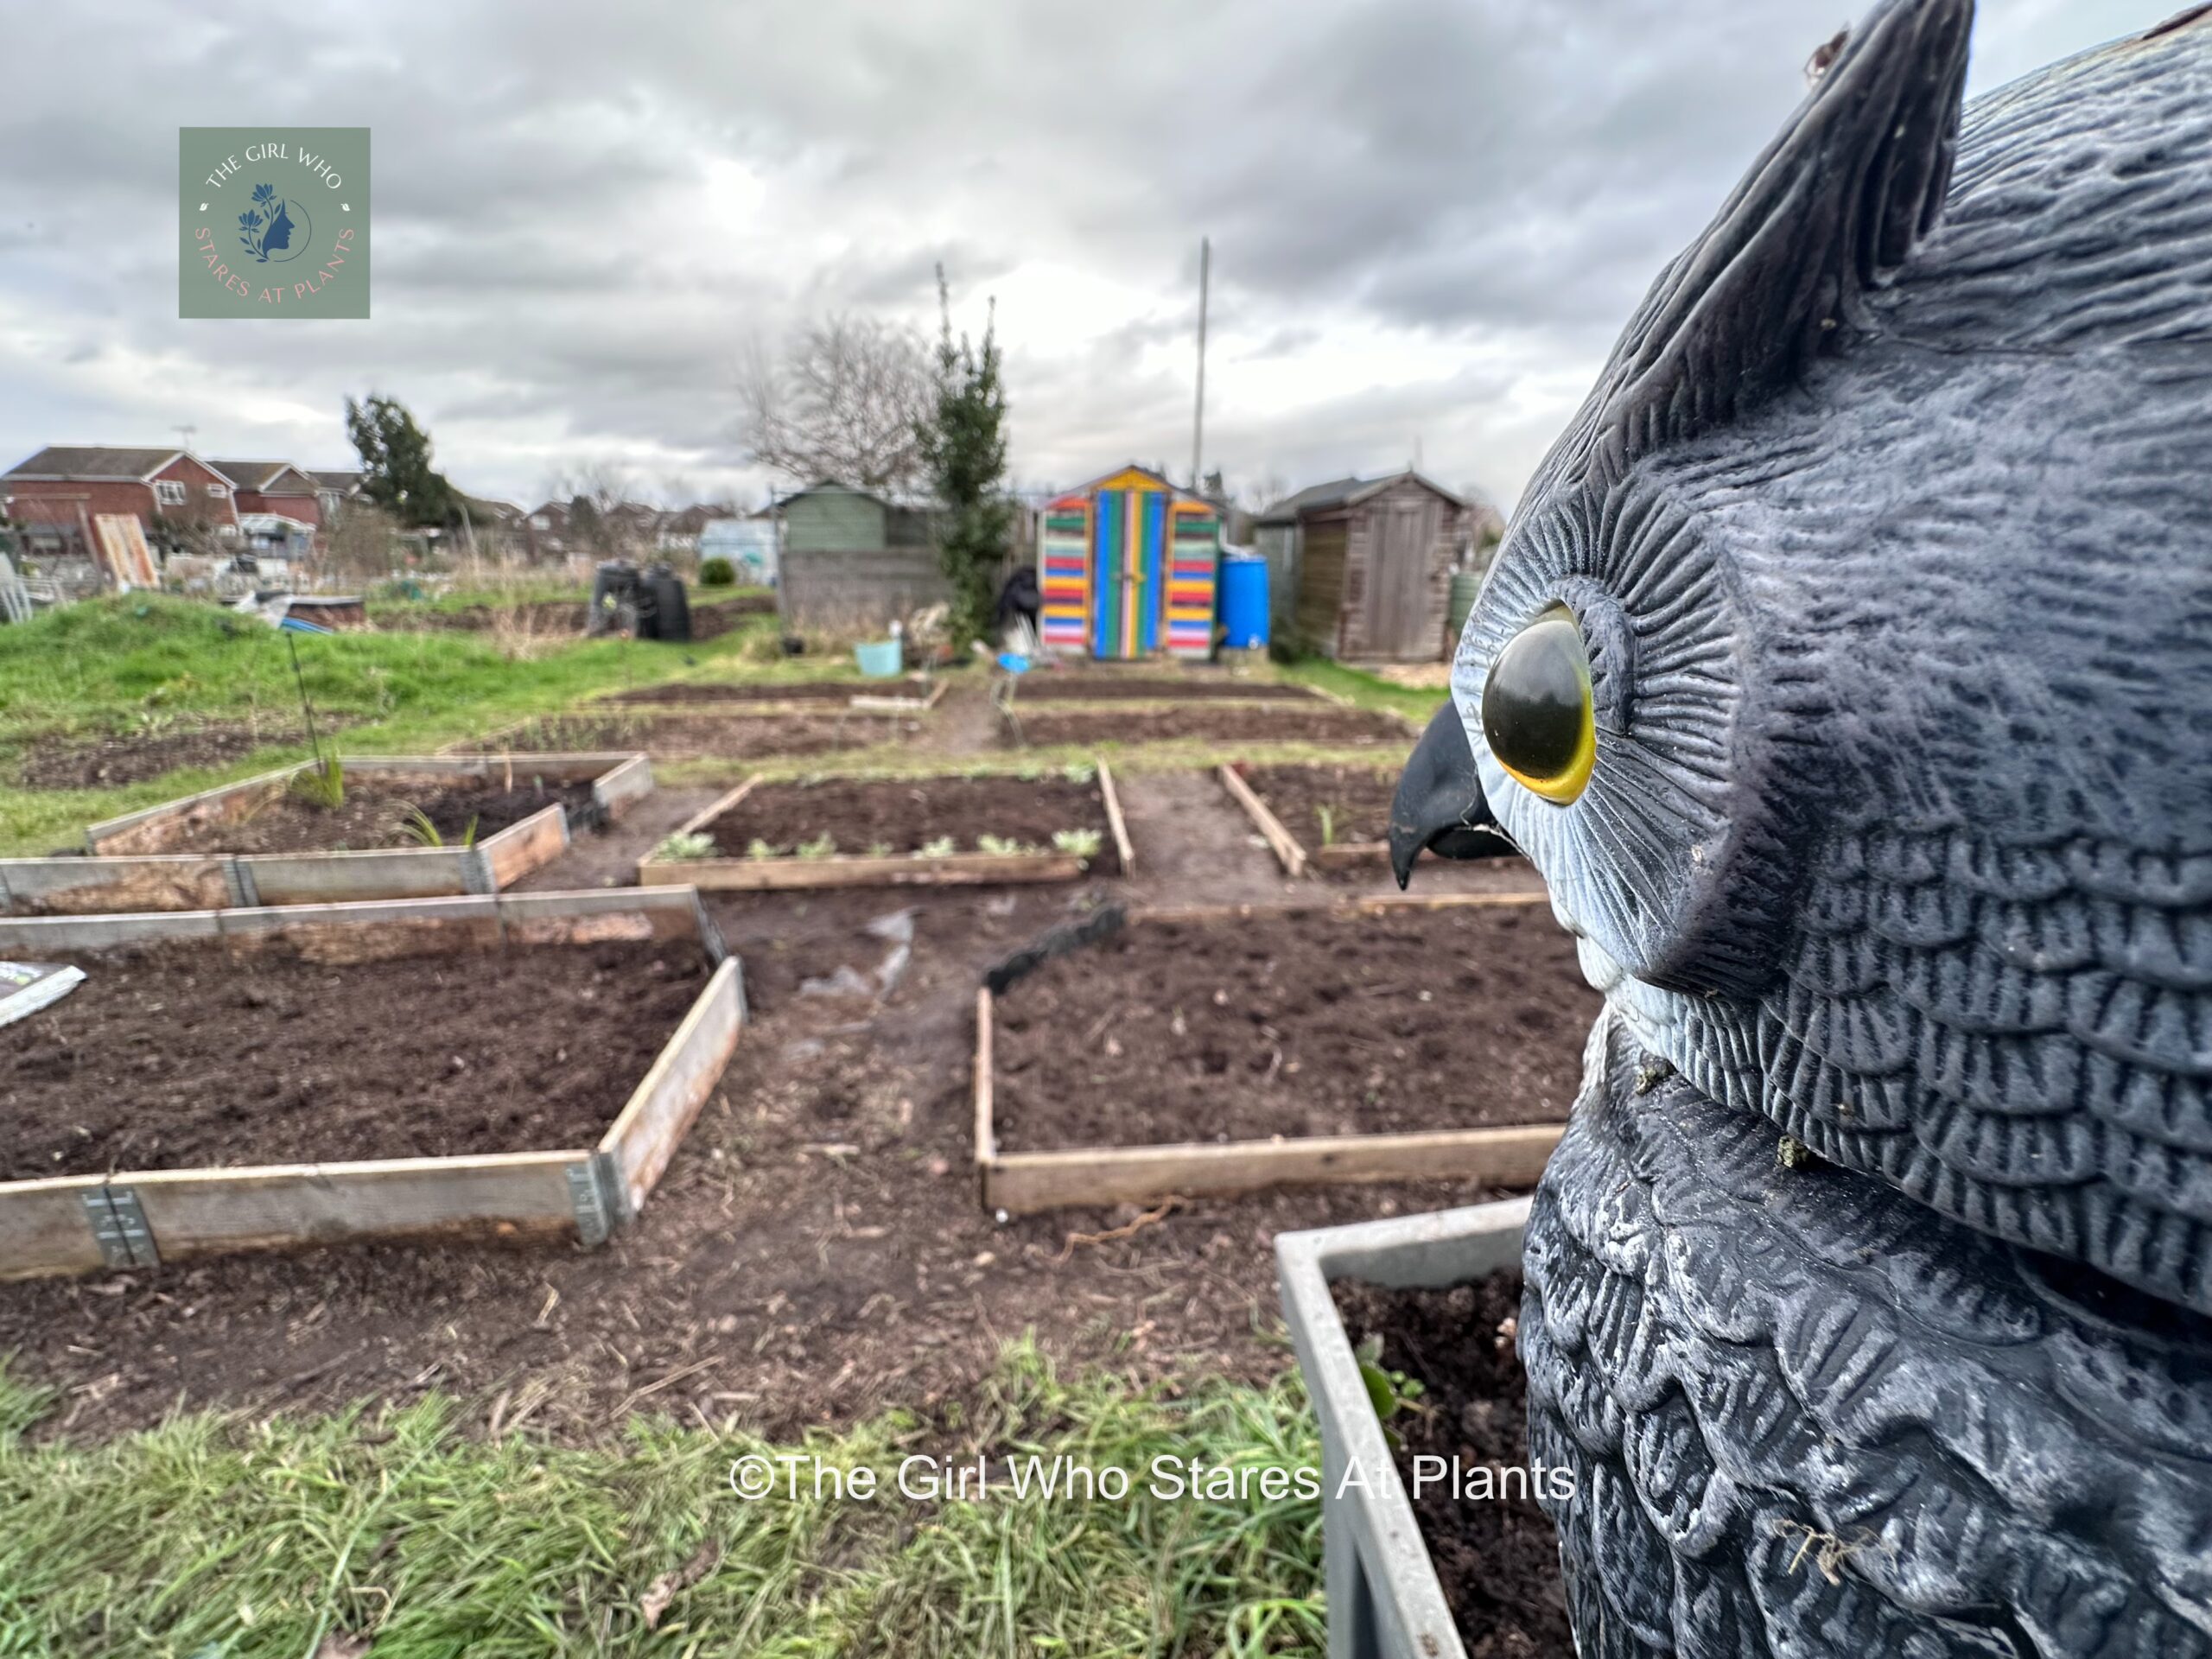
Last month (January 2024)
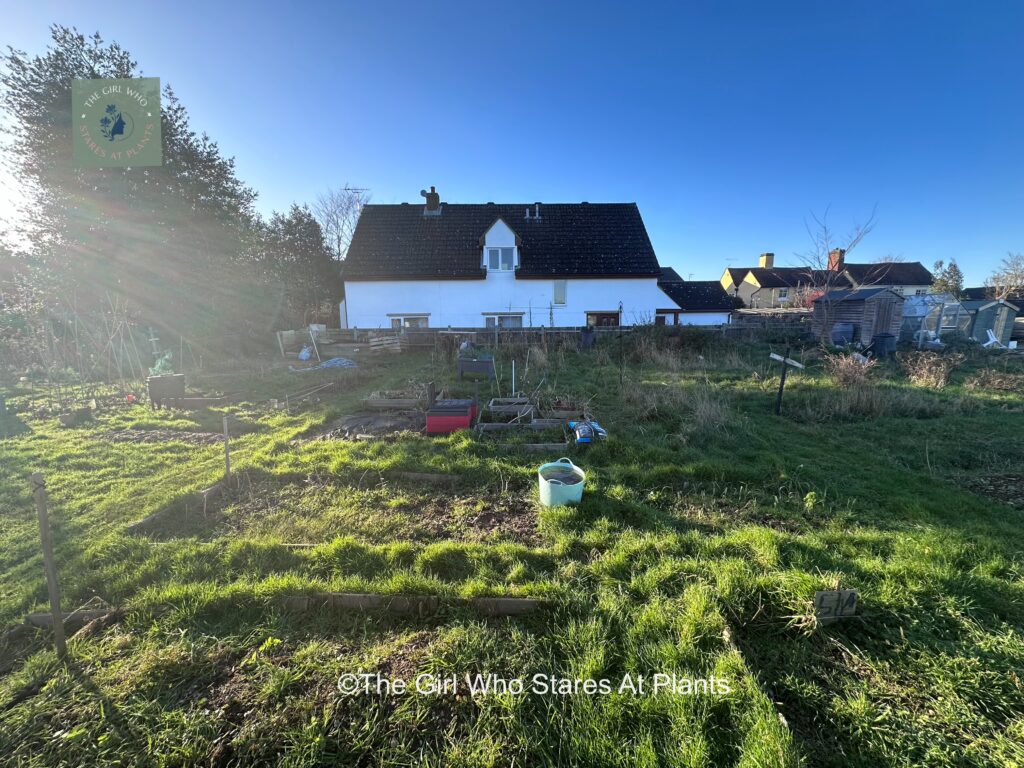
So, to remind you, this is what my allot-pot looked like at the start of January:
This month (February 2024)
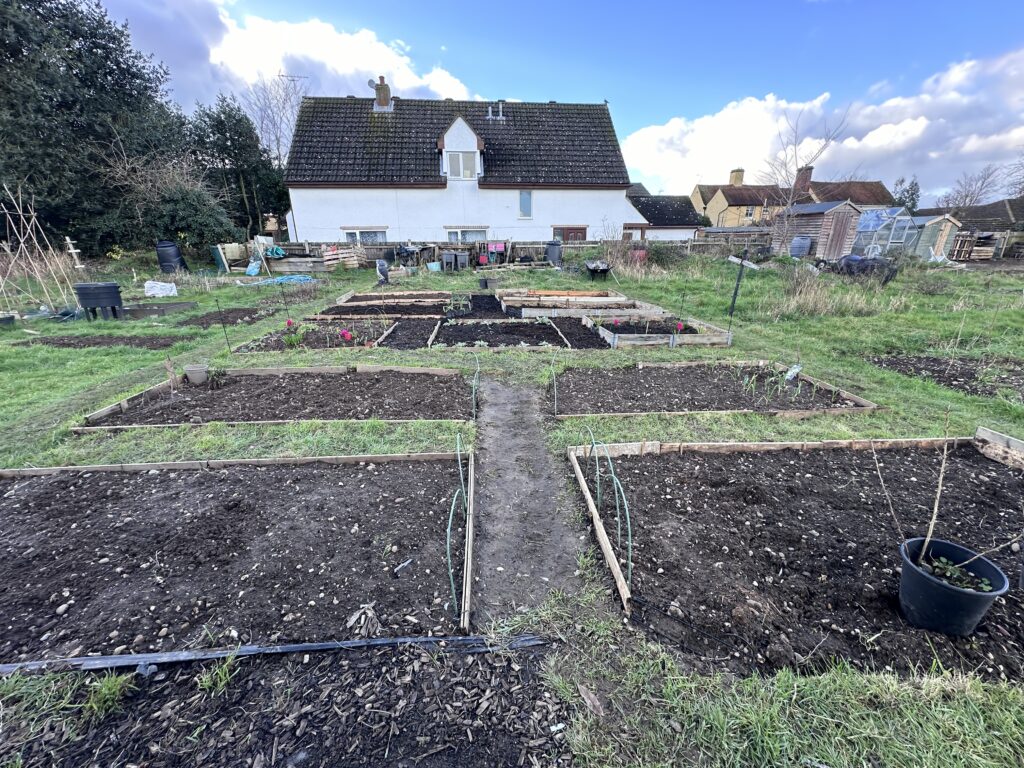
And to whet your appetite somewhat, this is what it looks like now (February 2024)
Allot-pot objectives
January’s objectives
Firstly, I think it really useful to see what I wanted to achieve this month. The reason I do this is because it ensures I make the most of my time at the allotment, and stops me from staring at plants 👀So, let me remind you what January’s objectives were, and what I actually achieved.
- Fully design the allot-plot ✅
- Complete a planting plan ✅
- Write a list of plants and seeds and start buying them✅
February’s objectives
Next come Februarys objectives, again with the tick if I actually achieved it.
- Dig out and create planting beds ✅ (nearly)
- Create non-grass paths ✅
- Sow seeds for this month ✅
- Transplant perennial plants ✅
How did I do it?
So now you know what I managed to achieve, would you like to know how I did it? If you would like to know h how I have done any of these things in any detail, please comment after the post and I will do my best to give you a detailed description.
How I created my plant beds
Digging over and why
There are various ways of making plant beds, but the ones I use tend are the no-dig or the single dig methods. However, I also surround them with some kind of solid borders. For my allot-plot, I have used the single dig method because the ground was turned over previously, so minimal disturbance was needed. Also, the weeds were relatively easy to pull out by hand – erm, that is when you haven’t been weeding for hours!! If you are intrigued and want to find out exactly how to do this, (the single dig method, not the weeding) then click here.
So, I considered the no-dig method, but firstly it wasn’t necessary here (see above for reason 👆), and secondly I have a number of perennial plants and bulbs that I needed to dig up and, I have enough plant murders on my conscience!
Why my allot-pot design changed a bit
When I began, I randomly chose to start in the middle of the plot. Why, I hear you ask? Who knows is the truthful answer, however it was good that I did because I was able to repurpose all the raised beds there.
Whilst I was doing that, I realised that the original plan would not work, because the beds were going to be too big. As a result, I reduced them in size and ended up with extra paths. This was because it is best practise not to trample all over your freshly dug soil and squish the worms. And also because compressing the soil isn’t great either, as it stops the water getting to the plant roots. Therefore with the extra paths, I can reach the middle of the beds from any side.
Edging using old wood and bamboo as stakes
The next thing I did with the beds was edge them with wood and added old brackets for extra stability. Furthermore, I used old offcuts, and repurposed the raised beds. This way I didn’t have to spend anymore money unnecessarily and it stops the grass paths creeping their way into my nice weed free beds!
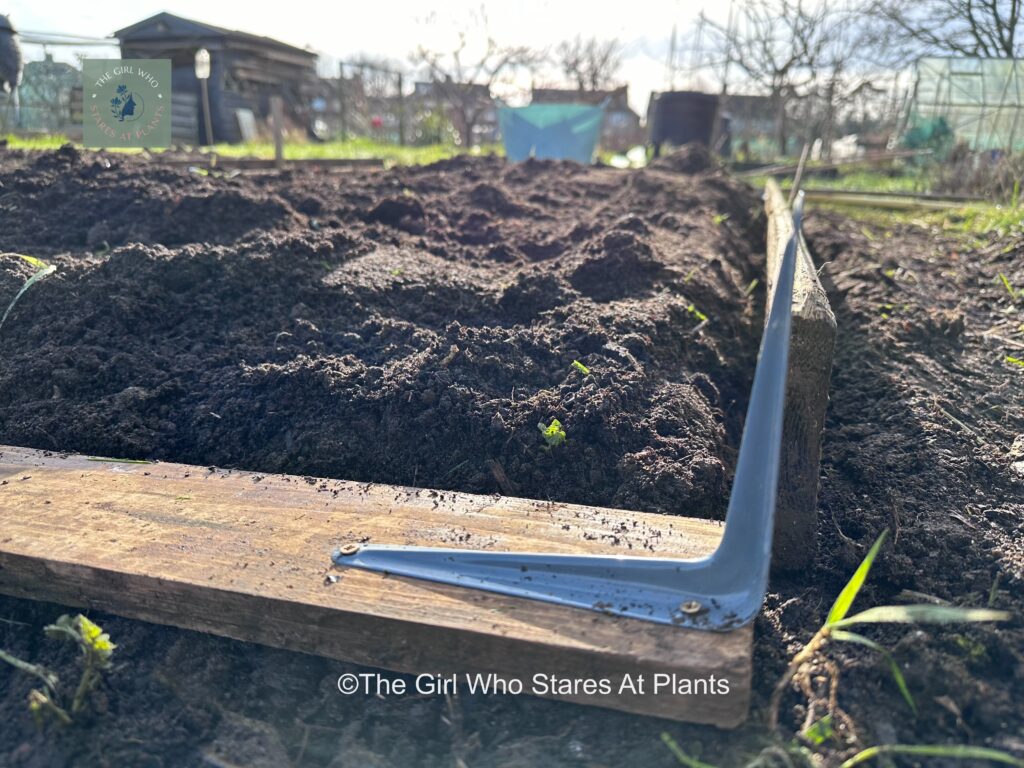
In order to keep the wood in place, I used bamboo stakes and placed them alternately inside and outside the planks of wood. Then I banged them into the soil which kept the wood nice and stable.
Added compost
Finally, once my bed was weeded and protected from pesky creeping grass, I added some compost as a mulch at a depth of 3-5cm. The reason for this was to give the soil a helping hand with some added nutrients, and to suppress any stray seeds that may have found their way into the beds. I REALLY don’t want to do that much weeding again any time soon!
Allot-pot pathways
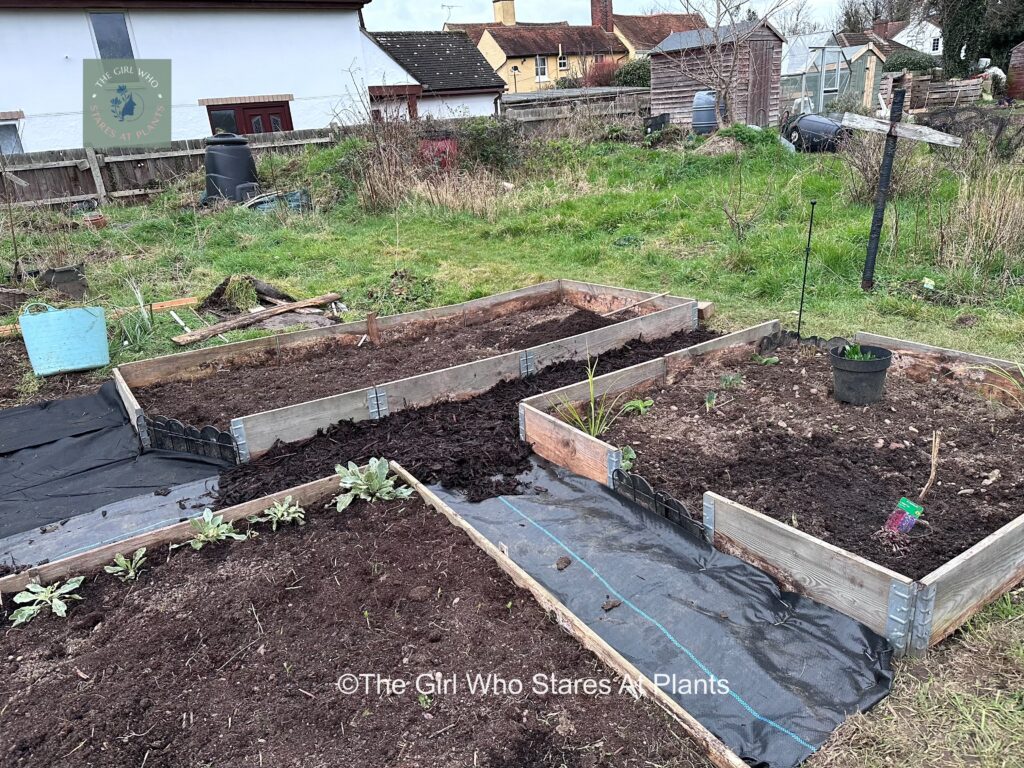
Next, I turned to my pathways. I am sure you will have noticed that the planting beds themselves created nice pathways for me, however, I am trying to reduce the number of grass ones for several reasons. Firstly, grass paths need sowing so this means more time and effort on upkeep rather than caring for the plants. Secondly, I like the look the of bark paths. And as its my allot-pot I can do what I wanna!
My first task was to make the paths level-ish. ‘Ish’ because the bark is going over the top so it doesn’t have to be perfect, but I did didn’t want massive holes for obvious reasons!
Secondly, I put down a layer of permeable weed suppressing membrane. The reason for this was because I don’t want cheeky weeds popping up on my paths, but I also need water to be able to get to the soil, hence permeable membrane. Then, I covered the membrane with landscape bark to a depth of 5cm.
Compost bin Building
Now I have a confession to make – I didn’t make the bins, Nick did (Thank you!) However, I know how he made them because he was following my instructions of course (only joking)(not really 😉)
The bins are made out of pallets, screwed together in a U shape and then surrounded by chicken wire which keeps all the potential garden waste escapees firmly locked up.
Furthermore, there are three of them and this is for a reason. The first bin is where you put all your garden waste. When this is full, you move to the second bin and whilst this is being filled, your first bin gets to work decomposing. By the time you have filled your second bin and are on to filling up your third, your first bin will be well on its way, if not nearly finished making compost! See, it’s well timed magic!
Planting and sowing this month
I have been lucky in that there are a number of plants already in the allot-pot from last year. These include raspberry canes, gooseberry bush, blackcurrant and redcurrant bushes, perennials such as dahlias (how these survived the winter I don’t know), delphiniums, lupins and daisies. There is also a large bay tree (which needs pruning I might add). Plus, a bed of strawberries which were very neglected!
Therefore, I have dug up and moved the flowers into the beds where I want them to grow, but have left the bushes where they are as they are already established. Also, there are a number of flower bulbs which are growing nicely so have dotted them around the plot. Similarly, I have transplanted the strawberries into their new home and given them a spruce up (trimmed off the brown leaves).
Step-over fruit trees
Although, I have mainly been digging beds at the allot-pot and moving plants about, I have also planted 3 fruit trees which I am hoping will over time become step over fruit trees. I planted an apple (golden delicious), a pear (conference) and a plum. Whilst I have never done this before, its good to give it a go, so fingers crossed for me🤞.
Sow and Grow
Finally, I have also sown a few seeds that I will be using as cut flowers and food. In particular, I have sown varieties of tomato, cerinthe, malva, sweet peas, dill, parsley, lovage, chillies and strawflowers. If you want to see how to do this, follow me on Instagram here.
End of the first allot-pot month!
So there you have it, the first allot-pot update.
I will aim to post my next update around the middle of March and am hoping to achieve the following:
- Finish off the planting beds.
- Build the hazel bean pole structures
- Build the sweet pea teepee
- Plant the central cherry tree
- Plant the perennial herbs, raspberry canes and rhubarb
In the meantime, keep watching my daily tips on Instagram and facebook as I keep sowing and growing.
JT x

