Welcome to my allotment!
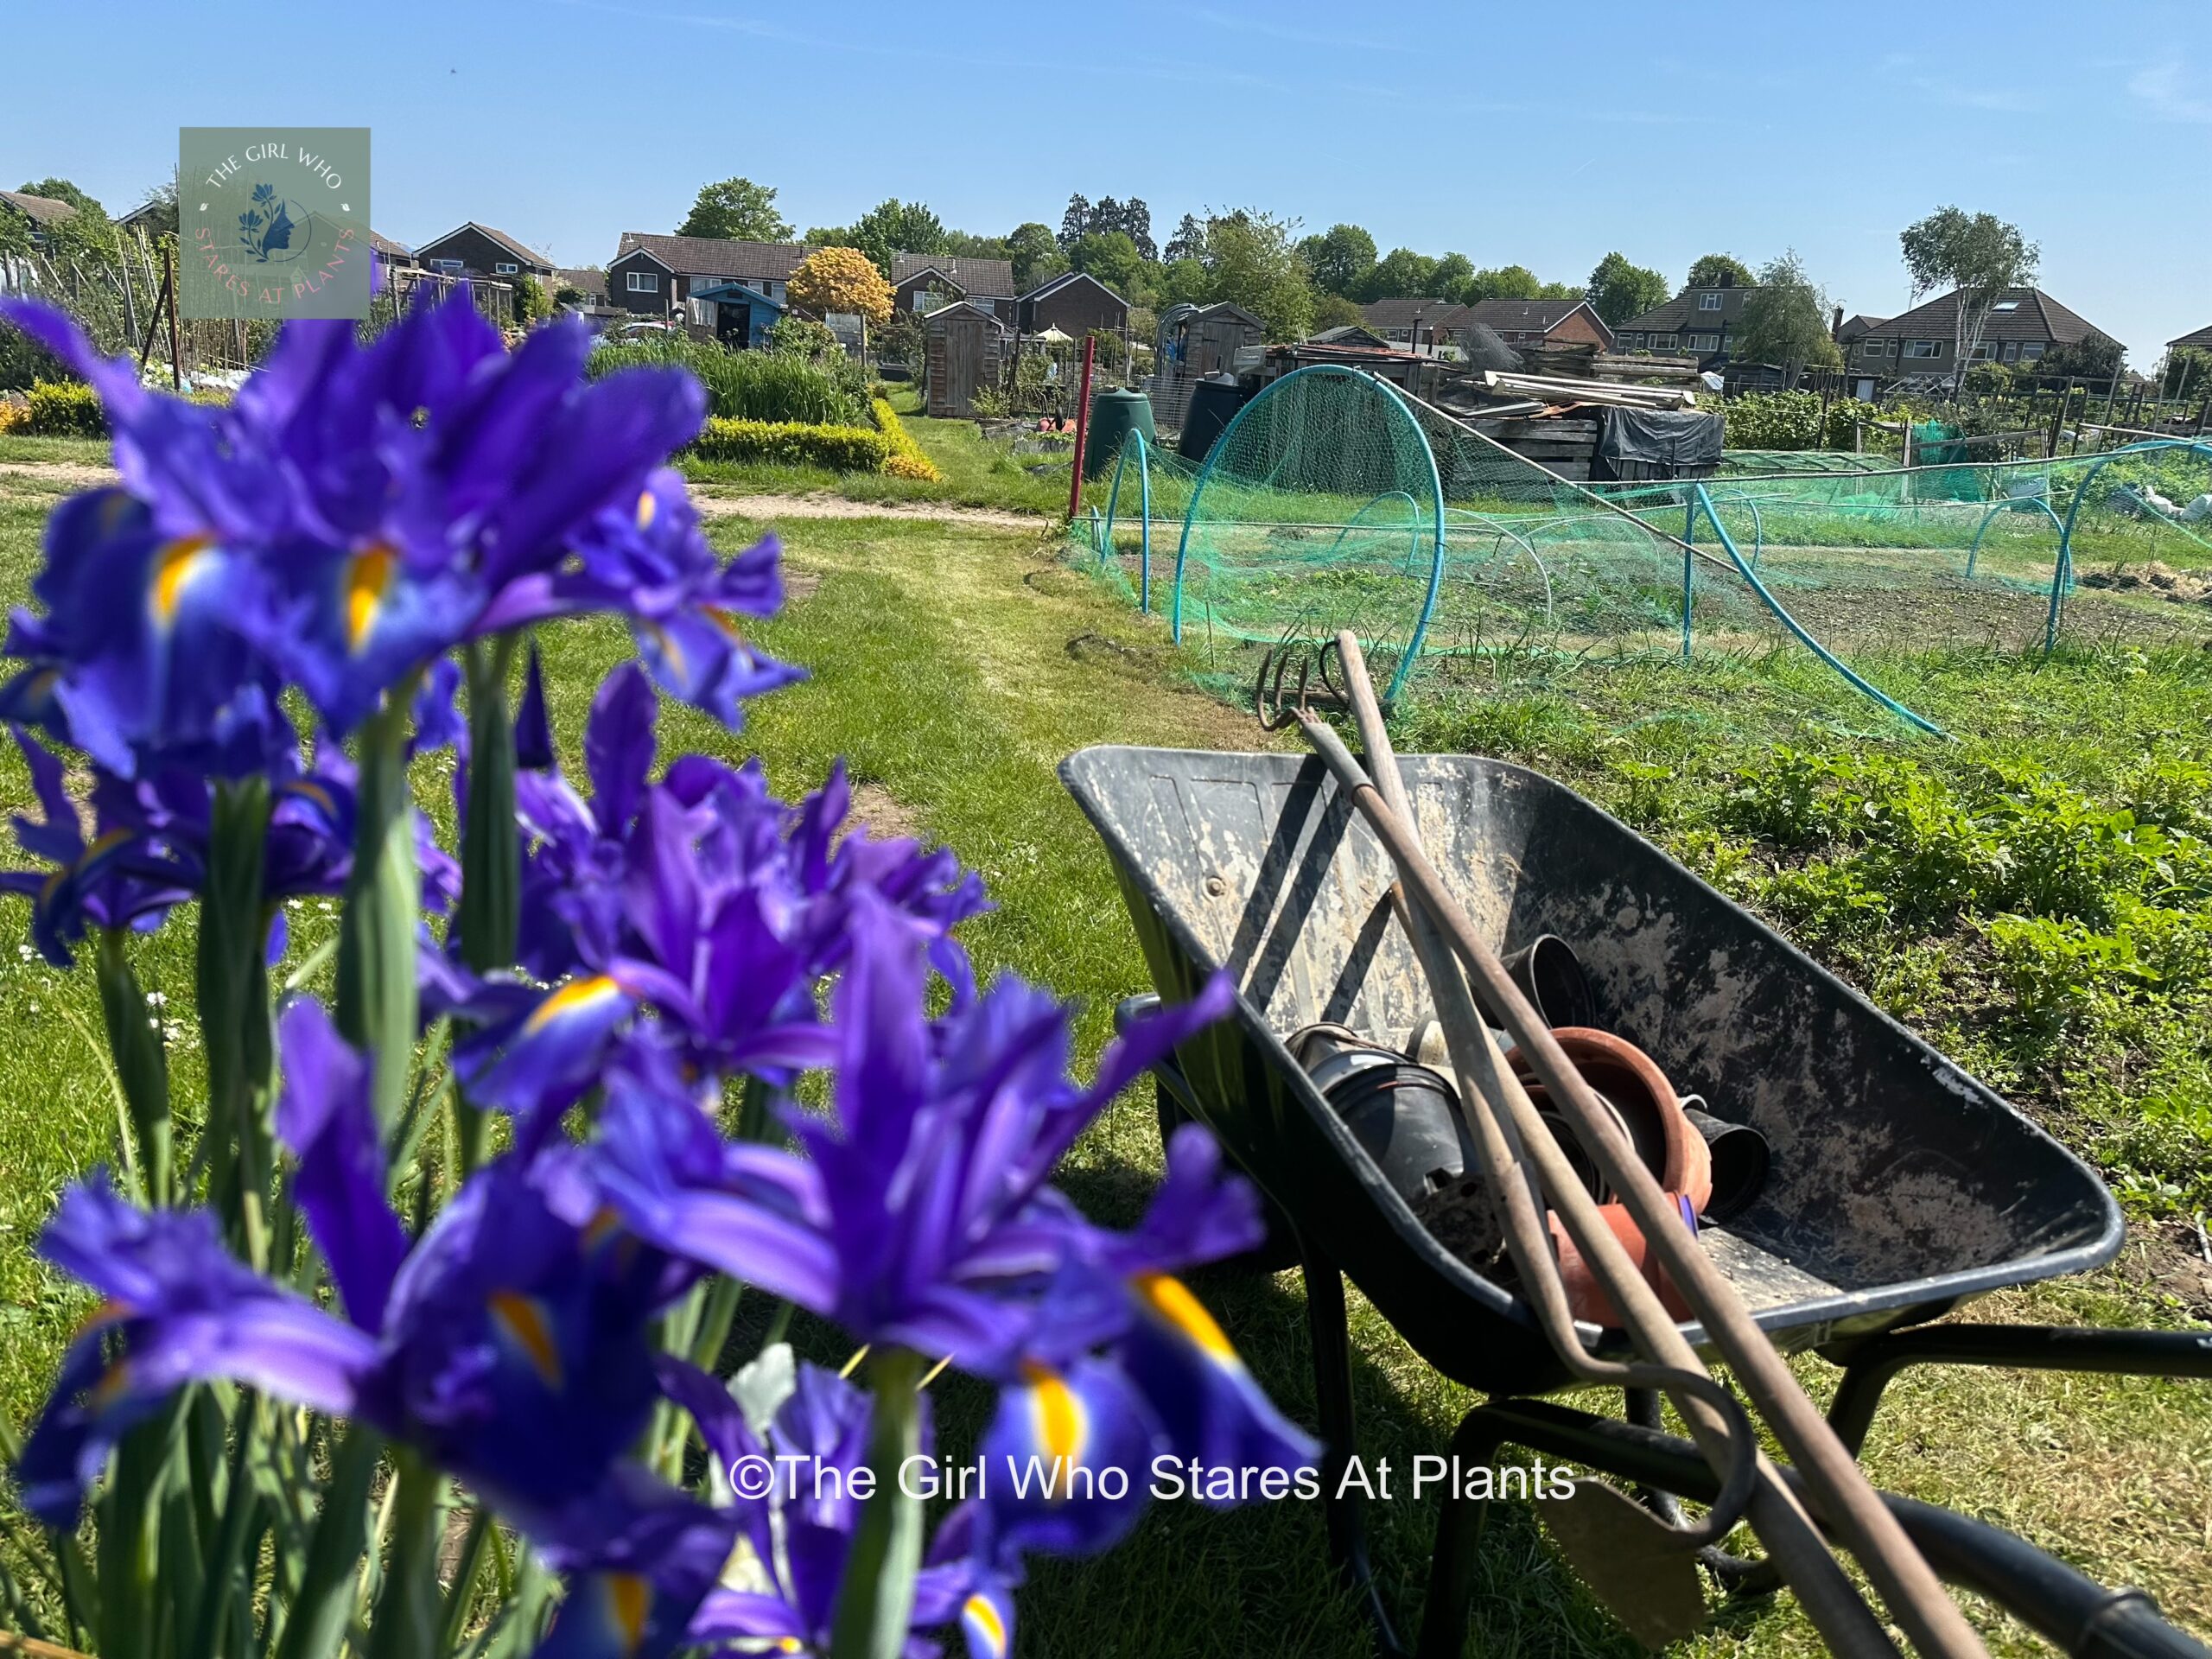
This is the first instalment of what I hope will be many years of messing about in my allotment, which will shortly become a potager garden. As that is such a mouthful, I have decided to call it the allot-pot!
You heard it here first!
So how did this come to be I hear you ask. Well. My mother has an allotment, but she didn’t really want it for vegetables, she wanted it for cut flowers. Now I am totally on board with this, but, I do think that it is big enough for both. Because, she is getting on a bit now (sorry mum), I volunteered to assist. I also volun-told my other half Nick as co-assister. I’m sure you can imagine that he is very pleased 😝. So, in an effort to get the best of both worlds, the allot-pot has been born. Remember, you heard it here first!
January’s objectives
Firstly, before I talk you through the detail of my inaugural allot-pot post, let me give you a brief run down of my first month’s objectives. Furthermore, you will see little ticks next to what I actually achieved, and to be fair, I am pretty happy with it.
- Fully design the allot-plot ✅
- Complete a planting plan ✅
- Write a list of plants and seeds and start buying them ✅
So, as you can see, I did fully design the allot-plot and I completed the planting plan. Moreover, I kept note of how I did both and they are described in detail below just fo you. I have also bought most of my seeds and some of the edging plants that I will be using. This is because they were on offer and I couldn’t resist saving money at the same time!
Without further ado, here is my starting picture, taken January 2024!
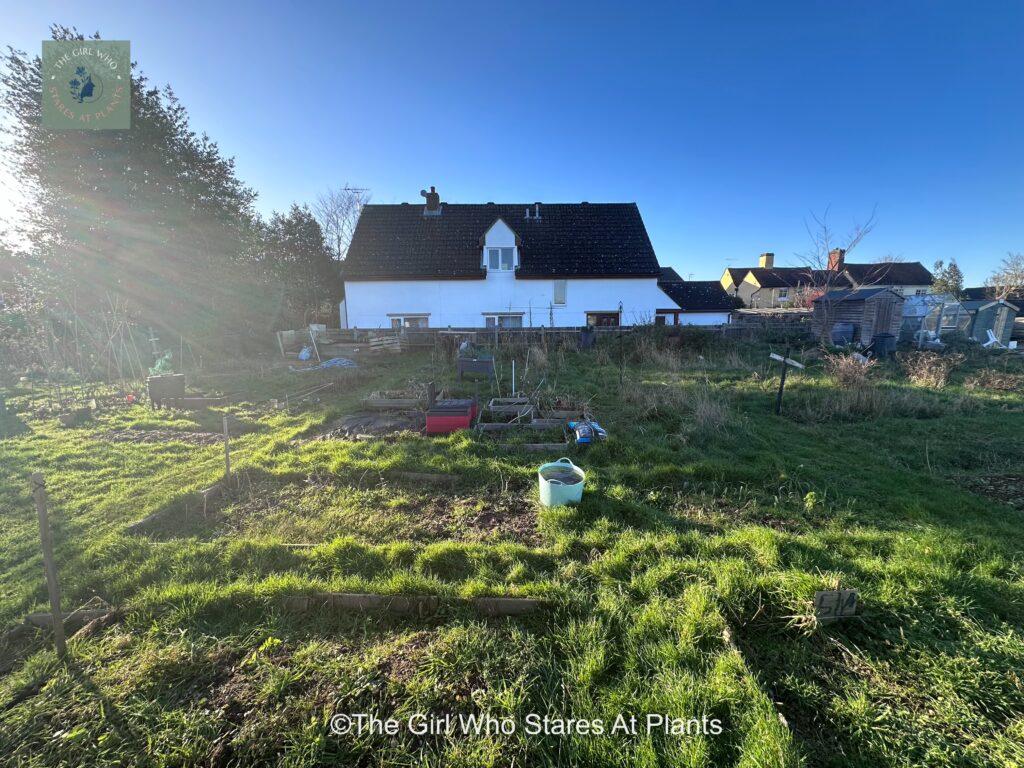
The what? The Allot-Pot!
I just LOVE kitchen gardens. As a result, I have visited quite a few both in this country and abroad. My favourite over here is Gravetye Manor, which is just Stunning!
Before we start, I have an amusing story for you. So, I was watching MasterChef the Professionals, and I may have had a few glasses of vino, when the Gravetye Manor restaurant was featured. Cue me, booking a table thinking it would be a lovely thing to do for Nicks birthday in March. Obviously, I was very pleased with myself. That is until I told him. Because I was then mocked for months! Clearly I was p*ssed as not only did it cost a fair bit, it was a wasted gesture as I confused Nicks birthday with the kids. However, we had a lovely visit and I discovered the kitchen garden, whilst Nick got two birthdays. So, you’re welcome Nick!
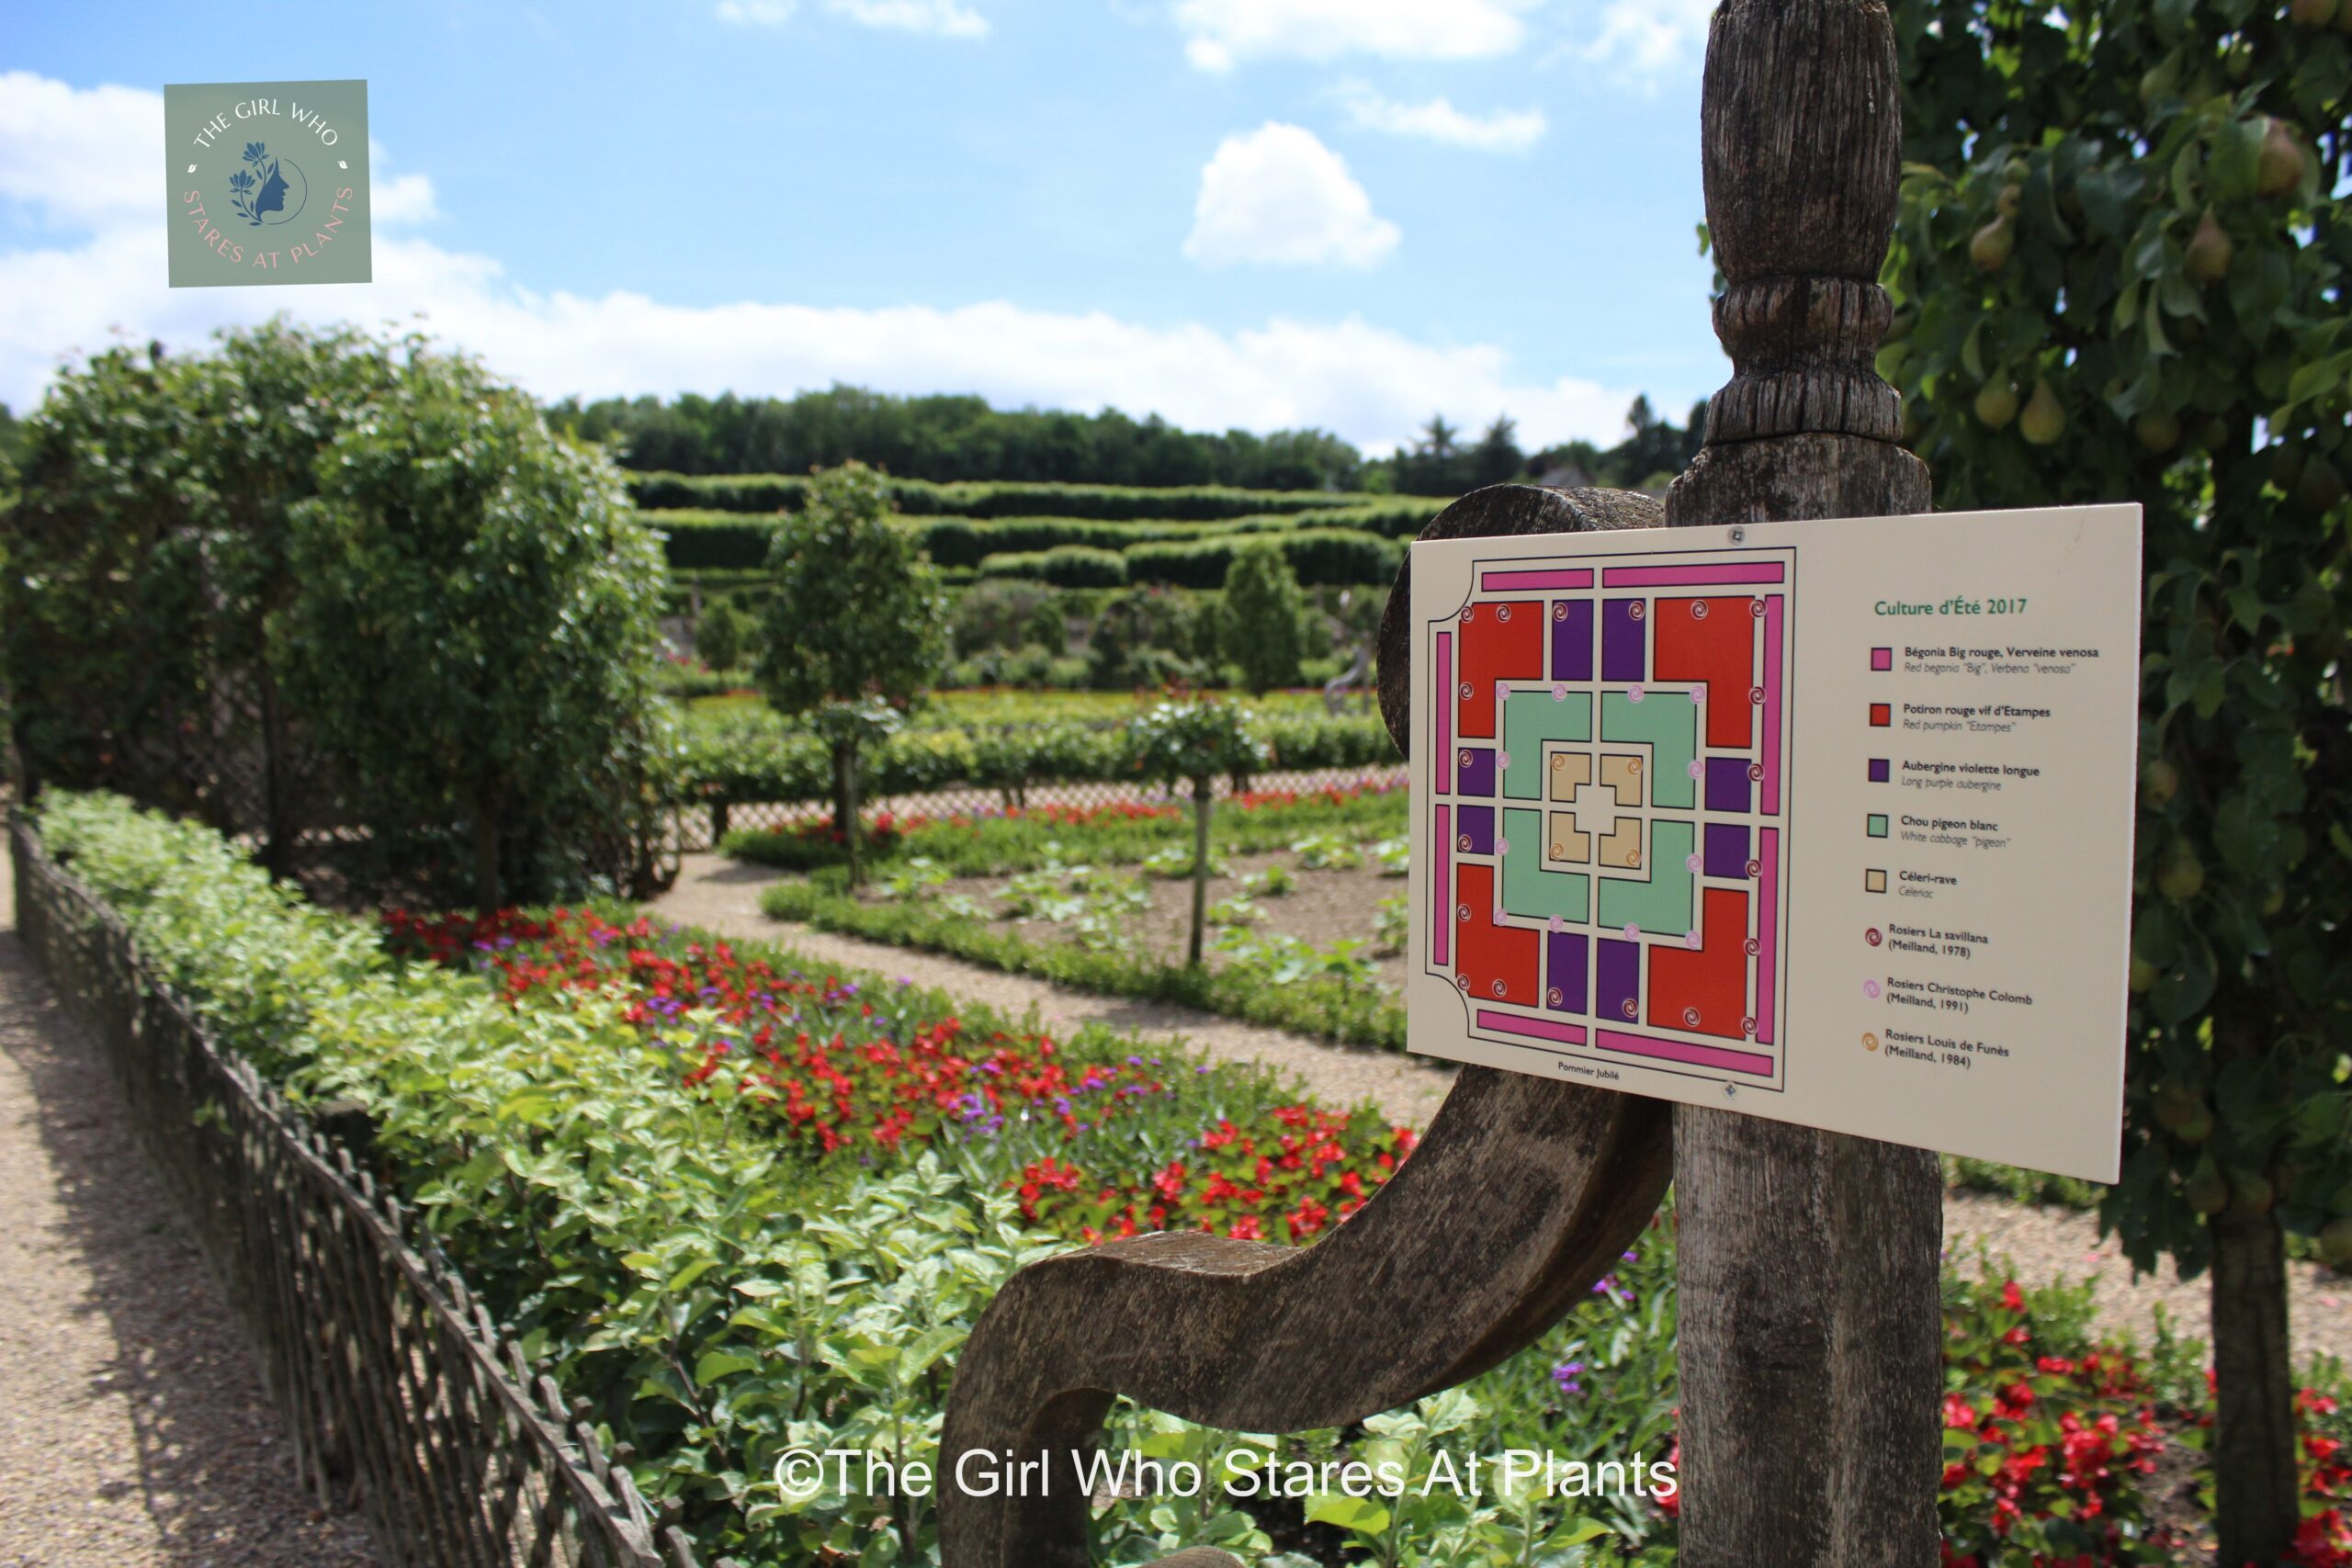
So, back to the subject at hand. My favourite kitchen garden abroad, is the garden at Villandry in France. Moreover, it is a French Potager garde and boy has it given me some inspiration. Thus, I thought I would try and have a potager garden in ‘our’ allotment.
Even better, (for you guys anyway), is that I am starting pretty much from scratch so I am going to record it and bring you all with me on my journey of allot-pot discovery.
Potager? What on earth is that?
What is a Potager I hear you ask. Quite simply, it is a kitchen garden that is both functional and beautiful. It is set out quite formally and is a mixture of both vegetables and flowers. Hence is is the ultimate companion planting garden. Also, you have to pronounce it with a French accent. It’s the law.
Now, as is right and proper, an allotment is a place where you are supposed to upcycle, recycle and repurpose. So I am going to try and do all those things within the boundaries of a potager garden.
Creating the Allotment, er allot-pot design
Clearly taking my own advice – with shameless plugging of my own post ‘The Ultimate Guide to Planning Your Own Dream Garden’, I have come up with a fabulous allot-pot design! Now, I warn you, I am not an artist. I think you may work that out from the picture below. But that does not matter! Because as long as you have some imagination and can wield a pencil, or in my case an Apple Pencil, you can design your own garden.
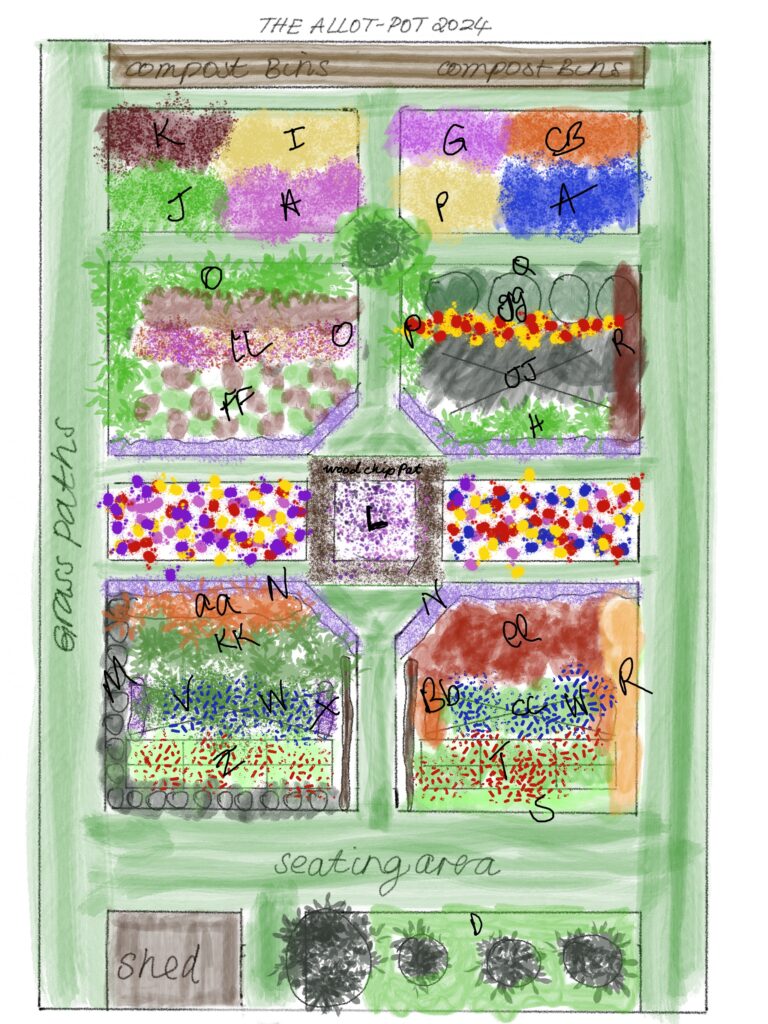
So, I think it would be useful to show you my thought process getting to this point, and how I ended up designing an allot-pot. Now, if you want to read about how I did this in detail, if you click the heading, the links will take you straight to my Easy Garden Design series. Before you know it, you will be designing your own garden!
No1. It’s all about you.
Before I even put pen to paper, my thoughts turned to these three things:
What do I want my garden to do for me?
- Well, in this case, I want it to be a productive garden, giving me lots of fruit, veg and cut flowers.
- I also want it to look pretty and to be able to sit there and enjoy the view.
How do I want my garden to make me feel?
- Obviously, this was an easy question – I want to be proud of all my home grown food.
- Also, I want feel relaxed and happy, so I need lots of colours and scents from the flowers.
How much time do I have?
- Well, this will take more work than your average garden, so I expect to be out there every other day. But once the plants are grown and the borders are made, it should just be a matter of feeding, weeding and watering.
No2. It’s all about awesome site assessment
Next, I need to really look at the space I have.
Assess
- 📏Firstly, I measured the plot. Relying on guesstimates is not a good idea! My allotment is 19 metres long, by 6 meters wide, a total of 114 metres square. Furthermore, this does not include the space where the little shed is sited.
- 🧤Because I have been helping mum with it for the last few years, I know quite a lot about this little plot. For example, there are a LOT of grass pathways, and not that many veg beds! But the soil in the beds is really good!
- 🫐Also, the plot is really flat and there are no trees, a few bushes and a smattering of perennial plants. These include fruit bushes, dahlias, lupins, delphinium’s and some grasses that I will dig up and re-use.
- 🕊️Lastly, the plot got very dry the past few summers so the produce will need to be protected from birds and animals.
Aspect
- Secondly, I considered the aspect.
- As it is an allotment plot, it isn’t really overshadowed by anything, although there is a house at the bottom of the plot which casts a bit of shade. However, that only shadows the compost area, so it doesn’t affect the planting.
- Also, the plot is south-west facing which means it will get a lot of sun. Result! This great for flowers and veg!
Muse
- Finally, I sought out inspiration and my muse for this little project came from my bookshelf!
- 📖I’ll be honest, I had forgotten I had some of them! However, I made a welcome discovery in that one of the books was an American kitchen garden book.
- Significantly, when I opened the book and started reading, the potager garden came up. Then I remembered my visit to Villandry so looked back on some of the photos I took, and BOOM, the allot-pot was born!
- In order to further my creativity, I turned to Pinterest and a vision started to form. Likewise, if you would like some Pinterest inspo, you can click here for my Pinterest page and allow me to be your muse!
No3. It’s all about the logical layout
Next, I considered the layout of my allot-pot. This wasn’t really that difficult, as potager gardens follow generally similar formats. For example, individual beds surround by pathways. However, I still went through my process and it looked like this.
Highway
- My main paths need to give me direct access to the whole plot, so I went for simple straight lines. There are three vertical paths, one on each side of the plot and the other straight down the middle.
Pattern
- Then I looked at the pattern. Personally, I prefer symmetry, and I wanted to make it easy for myself when digging the beds so I went with more straight lines. I needed to be able to service the beds from each side to try and avoid stepping on the soil in them. So that’s why there are more horizontal paths creating 4 beds, with one long one across the top for cut flowers.
Scenic routes
- So because this is a small serviceable plot there aren’t any scenic routes. The paths and the beds themselves create the routes and scenery for this design.
No4. Embellishment
Now to embellish my allot-pot and make it look really beautiful as well as being productive
Height
- 🪵So, this is relatively easy on an allot-pot because structures are needed to grow climbing vegetables and flowers. As a result, I have designed height in each of the four beds, with one central obellisk. Thus, 3/4 of the beds will have natural hazel supports taken from wood in my own garden, which will support the beans, peas and climbing flowers.
- 🌻Similarly, the 4th bed will have tall cutting flowers, that will be supported by either wood supports or metal plant rings. Lastly, the central obellisk is specifically designed for sweets peas and where I can see and smell them!
Vista
- ☀️As this is a small garden, you would think your vista’s are limited. Well I think I can still have a number of great views. In particular, the sweet pea obellisk will be my main focal point.
- 🌸Additionally, the wide strip of flowers at the bottom of the plot, will obscure the compost bins, and will be another great view.
- 🍒Likewise the cherry tree will draw the eye. Moreover, the grass paths mean I can take a camping chair and go sit anywhere within the plot and enjoy a different perspective.
Textures
- 🪵I am all about upcycling/recycling so I will be using as much coppiced hazel from my garden as I can. In particular, this will be for the structures. And if I have enough, I will use it to create edging around the beds which will create a lovely rustic feel throughout the garden.
- 🌈Because we have already painted the shed multiple colours, this will be a theme of the garden. Hence I will be aiming to get as much colour and texture of foliage as I can get in there!
- 🐝Notably, I will be adding a small wildlife pond next to the seating area, as no garden is complete without one. moreover, this will will help the insects when they are thirsty from all the pollination they are doing!
No5. Fantastic Flowers
Now to the fun bit! Over the years, I have worked out to only grow fruit and veg that you have a use for. So I have deliberately chosen plants and flowers that I will eat, or will do something with.
Right plants, right place
- 🤎Firstly, although I have already spoken about the soil, its important to know what the pH level is, so I will do a test to see exactly what I have got.
- ☀️As discussed above, the plot is mainly in the sun, which means I am going to have to be clever with my planting. For example, leafy veg like spinach and rocket are prone to bolting if they don’t get enough water, so I am going to plant them in the shade of taller plants to protect them a bit.
- 🌿As well as variety of plants, I am also going to use some companion planting methodology. This is where two plants help each other out. For example, rosemary repels cabbage flies, so I will plant rosemary and cabbage together. In the same way, basil helps out tomotoes, and borage helps out almost everything by attracting insects which each aphids.
- 🍈Also, I will be including perennial flowers and vegetables, such as rhubarb.
Height of plants
- As well as structure, using plants to create height and interest means that you can have flowers filling your vision wherever you look.
- 🌻For instance, I am going to grow flowers that are great for cutting, as well as giving me something pretty to look at. Therefore flowers like dahlias, which come in all different heights, will be present in mass.
- 🍈Because I am looking for year round interest and produce, I am including fruit bushes which are perennial and will also add some structure. Additionally, there are evergreen herbs that fulfil this criteria such as rosemary which grows into a large woody perennial shrub.
- 🌴And of course I cannot have a planting plan without some trees! Notably I will be using fruits trees as they are most suitable for allotments, and I have always fancied trying step over fruit. Hence, I have included an apple and pear tree for this. Finally, I am also going to add a dwarf cherry as it will give me spring flower, and autumn fruit.
Seasonal interest
- As mentioned, I want my allot-pot to be productive throughout the year, thus I will be growing plants that will survive winter. Consequently, Christmas dinner this year will hopefully include Sprouts and potatoes.
- Previously, I mentioned rosemary as an evergreen herbs, and I will use other herbs such as thyme and bay which will help with the plot looking good all year round.
- Finally, I want to highlight that flowers are not just for looking good when they bloom. Some look beautiful when they have gone to seed, and I will be including some flowers just for this reason.
Ta Da! The planting plan – from allotment to allot-pot
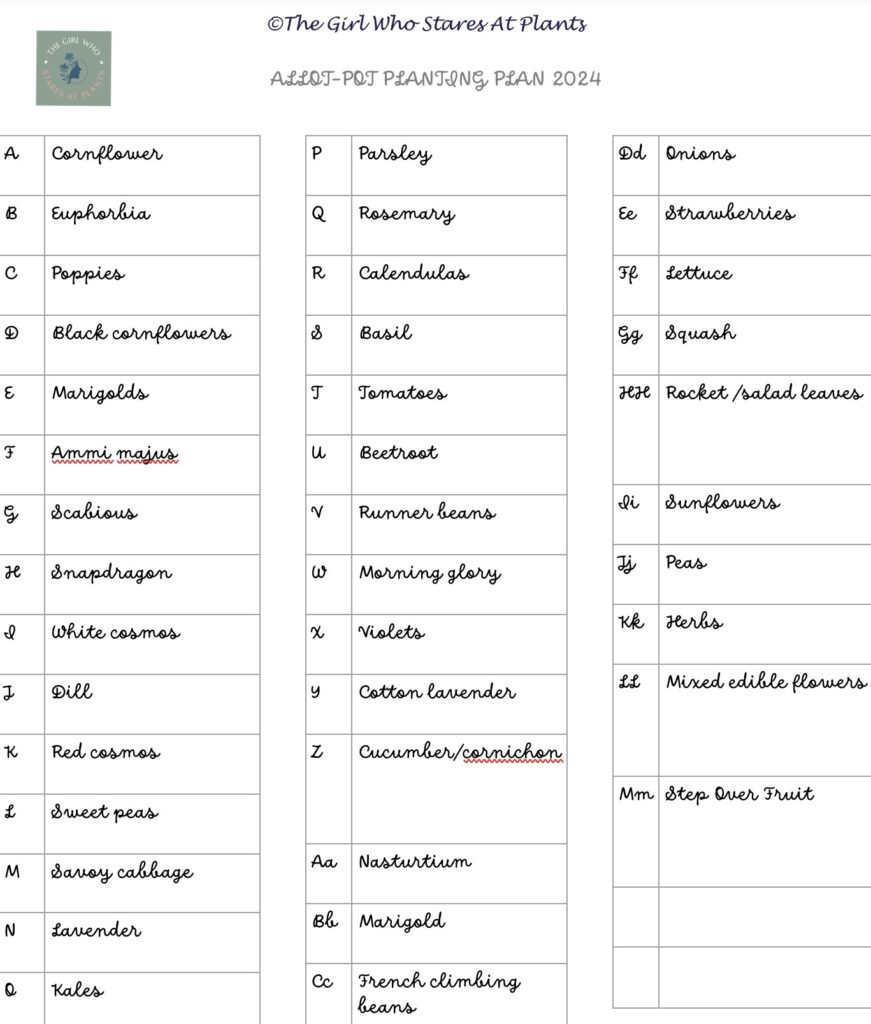
As a consequence of all that thinking, I now have a planting plan! Clearly, I am not an artist, however I am not bad with technology so I created my plan on my iPad, using Procreate. Therefore the below pictures should you the structure, layout and codes for my planting plan.
Of note, the letters refer to the plants that are going to be grown in the beds. Incidentally, I really should have measured it all perfectly, so I know how many of each plant I will need. A well as noting exactly what plant will be going where. But frankly, I don’t have time for that therefore any extra plants that I have I will give away or grow on in pots. This means that if I lose any to nature, I can replace them.

Conclusion
Finally, thank you so much for reading my first allot-pot post. Over the coming year, I will be regularly updating you on what I am getting up to, and how I am hopefully transforming it to something productive yet beautiful.
I hope you are excited about this as I am!
See you soon!
JT x

